Eliminating Marble Moisture Discoloration
The Water In / Water Out Shower Pan Method
Pavlo Starykov
Star Tile & Stone LLC
The discussion of light-colored marble discoloration on shower floors remains an ongoing issue for the tile & stone industry in the United States. I am often contacted by designers, specifiers and installers who have been disappointed by the fact that the recently installed light-colored marble shower floor has blotchy-looking wet “stains” that keep growing and sometimes begin to wick up the wall tile.
As mentioned in my article “Marble Moisture Discoloration: Don’t Blame the Stone!” (published in the September 2020 issue of the Slippery Rock Gazette), the problem is usually caused by the inappropriate materials and/or installation methods, and is usually a result from the lack of sufficient technical information on the installation methods for this type of stone in shower applications. In this follow-up article I want to share some very important practical recommendations in regards to light-colored marble installation on shower floors with the “dry-pack” method also known as “water in / water out” but first I would like to address some misconceptions about this problem.
Is light-colored marble suitable for showers?
Despite opinions I often hear about “high porosity of marble” and therefore its supposedly inferior performance in wet areas, this stone’s physical properties make it suitable for shower applications when installed correctly.
According to the Dimension Stone Design Manual published by the Natural Stone Institute, stones installed in wet areas “must be able to withstand frequent or continuous water projections, and in the case of showers, the presence of hot steam”. Therefore, “the best results are obtained with a dense, resistant stone, such as a granite, or a compact stone with a low absorption coefficient” (see Dimension Stone Design Manual, Version VIII, Chapter 3 – Stone Selection; Water Resistance 5.3).
 |
|
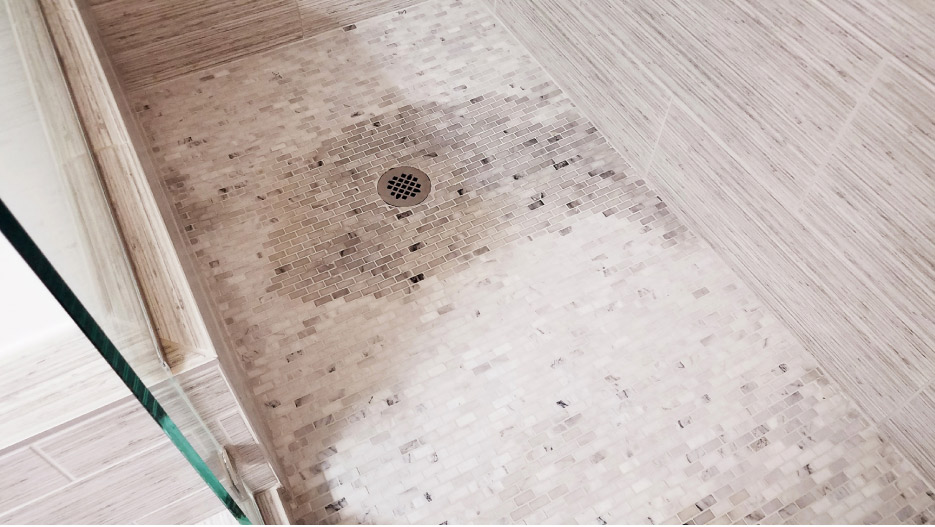
Above: Carrara marble tiles showing the unmistakable darkening of moisture discoloration. |
 |
|
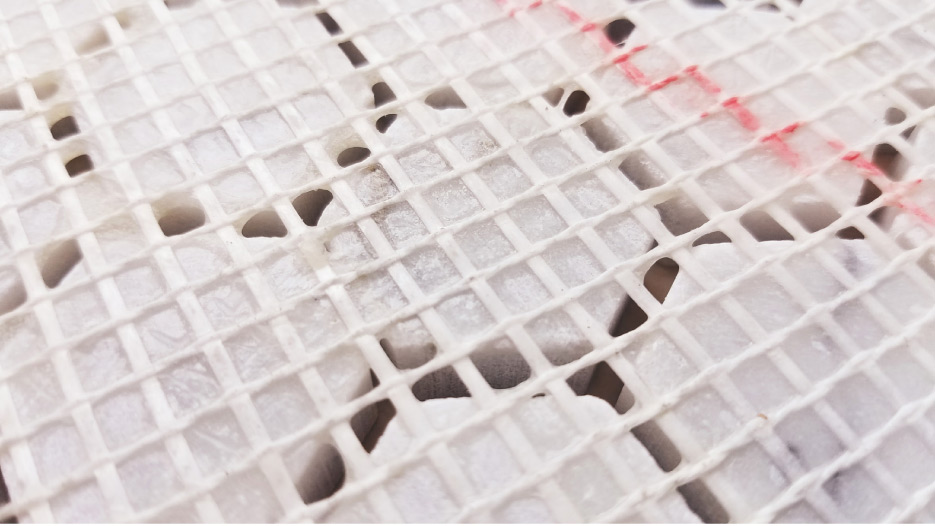
Above: Resin-backed marble mosaic tiles are recognized by the distinctive mesh “glue” coating on the back. |
Is marble a dense, resistant and compact stone with a low absorption coefficient such as granite?
Even though marble’s primary mineral, calcite, only has a Mohs hardness of 3 (versus 6th and 7th positions for feldspar and quartz that granite consists of), it is related to scratch resistance and not to the overall density and strength. Marble is still considered to be a strong and hard stone.
ASTM C97 represents standard test methods for absorption and bulk specific gravity of dimension stone (see www.astm.org/Standards/C97.htm). The ASTM C97 absorption coefficient by weight for most white marbles ranges from 0.9% to 0.11% which is equal to many granites. Some sources even give the absorption coefficient by weight specifically for Carrara marble as 0.3% - 0.10%.
Studies conducted by the Illinois Institute of Technology have shown that the durability of marble is little affected by cycles of weather. This is because of marble’s low rate of moisture absorption (see Dimension Stone Design Manual, Version VIII, Chapter 3 – Stone Selection; Water Resistance 5.3).
 |
|
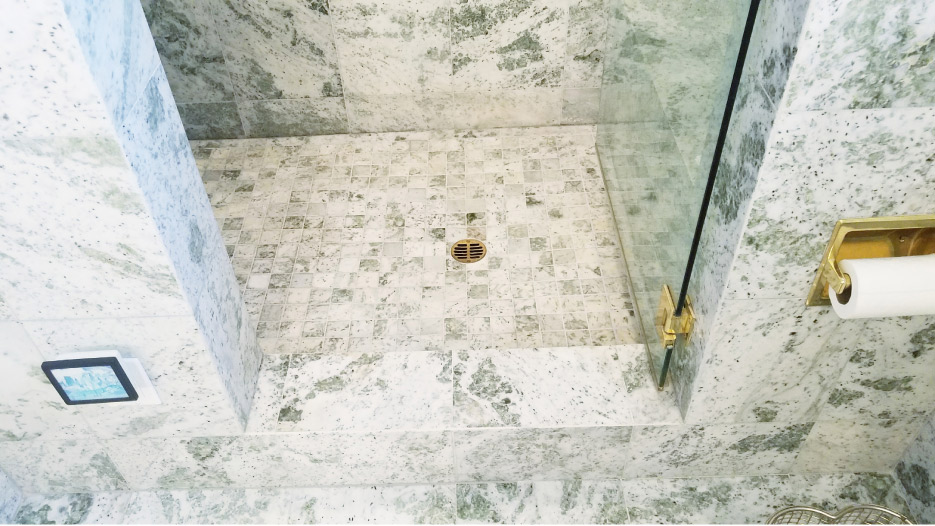
Above is a 20-year-old marble shower installed in Portland, Oregon with the Water In/Water out method. After 20 years of use it is in great shape. |
What about the density of marble?
ASTM C97 test results often range from 2.716 to 2.722 kg/cu.m which is even higher than of many granites.
In fact, marble is not very porous from a geological standpoint, but being a translucent stone, light-colored marbles like Carrara or Calacatta, simply shows the presence of moisture in it more obvious than many other darker, non-translucent stones. When installed with a proper method it will though never act like a sponge that holds water.
Given these facts, let us discuss the seven important things to know about the installation of the light-colored marble with a water in / water out system.
1) The benefits of the “traditional” shower pan method for light-colored marble
It is important to understand the benefits of the dry-packed mortar bed as stone’s substrate on a shower floor. Unlike most bonded sheet or liquid-applied topical waterproof membrane methods, the traditional water in / water out system is designed to provide not only the topical but also the internal water evacuation in the thick-bed assembly.
According to two of the leading researchers in the field of water transport in building materials, Christopher Hall and William D. Hoff, “In a porous medium such as a sand pack, formed from solid particles, it is obvious that all the porosity is connected. A nanoscopic ant could wander throughout the void space and eventually visit all points within it. This means that all pore space is available for flow of gas or liquid and is in communication with the environment in which the material finds itself” (Hoff, William D., and Hall, Christopher, Water Transport in Brick, Stone and Concrete, Second edition, pp. 6-7).
Even though cementation that takes place after mixing sand and Portland cement with water reduces the porosity of a raw sand pack, a properly installed dry-packed mortar bed still provides a highly porous bonding surface.
Such bedding allows water that penetrates below the stone to move away from the underside of tiles and eventually be evacuated via weep holes in the drain assembly. This allows marble to dry relatively quickly and reduces the potential for moisture entrapment.
2) Important limitations when marble is used with the water in / water out method
According to the Natural Stone Institute, “Stone tile with adhered fiberglass mesh reinforcement on their back surfaces are not to be used for shower applications” (Dimension Stone Design Manual Version VIII, Chapter 16, Wet Areas, Stone Tile Residential Showers, Steam Rooms, and Steam Showers, 1.3).
Such “adhered fiberglass mesh reinforcement,” also known as “resin backing,” is used to reinforce stone tile and to reduce the likelihood of fracture. The adhesive used to attach the mesh is not standardized, but is commonly an epoxy or polyester-based adhesive that truly seals the back of the stone, eliminating vapor transfer and significantly reducing the ability of Portland cement-based thin-set mortars to adhere to it (see TCNA Handbook 2020, Natural Stone Tile Selection and Installation Guide, Fiberglass Mesh Reinforced Stone, page 10, and Dimension Stone Design Manual Version VIII, Chapter 21, Restoration and Maintenance, 4.3.3).
It is important to understand that such backing adds an impervious or water repellent coating to the back of stone, reducing its “breathability” and creating a potential for moisture entrapment under or within the stone.
“Resin backing” must be either completely removed/scarified prior to marble installation, or stone has to be installed with the “epoxy method” that will be explained in detail in the next article on this subject (feel free to contact the author at Pavlo@startile.us if you have an upcoming project with a resin-backed marble in a shower).
3) Composition and installation of the dry-packed mortar bed
Best porosity for proper internal water evacuation is achieved with a dry-packed mortar bed consisting of one part Portland cement to four to five parts sand (see Dimension Stone Design Manual Version VIII, Chapter 16, Stone Tile Residential Showers, Steam Rooms, and Steam Showers, 2.2). Avoid using rapid-set polymer modified mortar screeds because they have a lower porosity which can significantly slow down water evacuation under natural stone installed on a shower floor.
Over-compacting the dry-packed mortar and burnishing the surface is not recommended (see Dimension Stone Design Manual Version VIII, Chapter 13. Installation, General Information. 3.1.2.4. Suitable backings).
Pre-pitch (also known as pre-slope or sloped mortar bed under the waterproof pan liner) and final slope must conform to industry standards.
“Dry pack” requires little water and should hold its shape when fully mixed but not be fluid like. Use a water measuring cup and carefully follow the mortar manufacturer’s instructions for mixing speed, time, and water ratio. Do not install floor stone tiles until the dry pack has fully cured to avoid moisture entrapment in the mortar bed.
4) Using a Waterproofing membrane / pan liner
The waterproof membrane, whether it is a PVC/CPE pan liner or lead/copper/hot-mop system, must smoothly follow the contour to the shower receptor and the drain body must sit flush with the substrate. A bead of suitable sealant is applied over the drain body before loosely-laid PVC or CPE membrane is clamped to the drain. Careful attention should be paid to ensure that the weep holes are not blocked with sealant. The bead should be applied just outside the clamping bolts and after the membrane has been laid over the drain body. It must be embedded over the sealant to flatten the bead to avoid partial blocking of weep channels (see Noble Company Technical Bulletin #015 “Securing Waterproofing Membrane to Clamping Ring Drains”).
It is important that there are NO wrinkles, “bird baths” or low spots in the pan liner, since these obstructions will block the passage of water and could impact the stone appearance on the top surface.
Weep holes protection is critical and should not be avoided!
Take a close look at how fast water evacuates into the drain after you pull the plug during the flood test. Any standing water will indicate an existing problem in the preparation work that needs to be corrected before you proceed. For more information see TCNA Handbook for Ceramic, Glass, and Stone Tile Installation 2020, Wet Areas Guidelines, pages 41-42.
5) Setting Materials
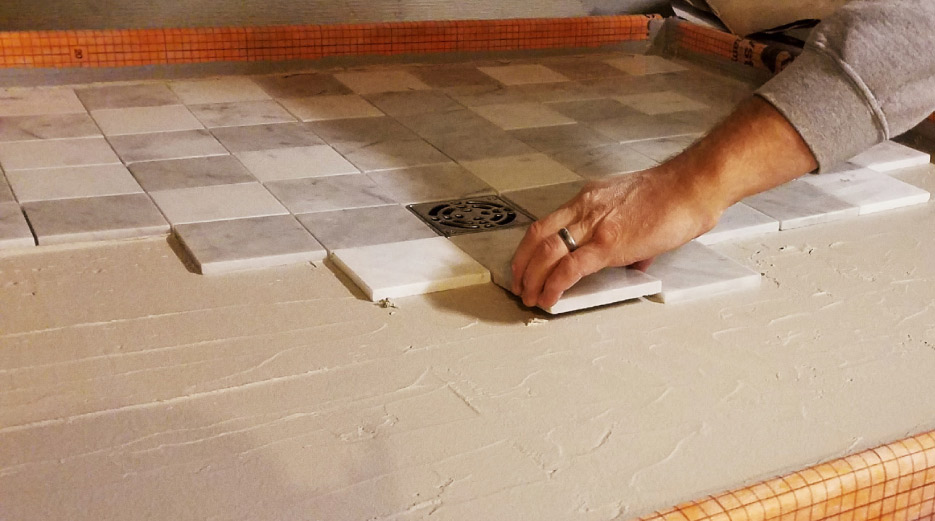
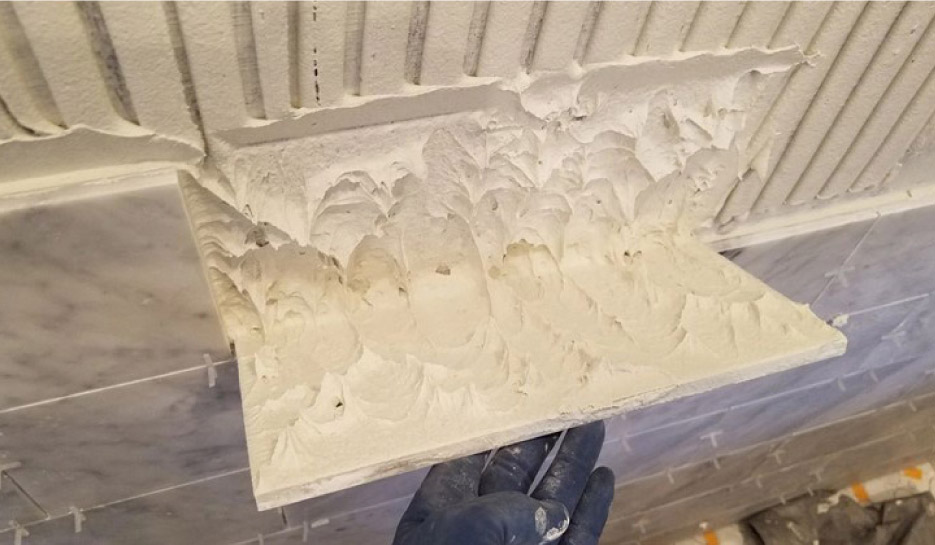
It is recommended that light-colored marble be installed with white thin-set mortar and the ridges are fully collapsed when the stone tiles are set in place. “100% mortar coverage between floor and sub-slab is recommended” (see Dimension Stone Design Manual Version VIII, Chapter 16, Stone Tile Residential Showers, Steam Rooms, and Steam Showers, 2.2). It is my opinion that unmodified thin-set (mortar that conforms to ANSI 118.1 standard) is the best adhesive to install marble over a dry-packed shower floor due to its higher porosity and drainage capability as opposed to the modified mortars that are more water-repellent and could slow down the internal water evacuation below the marble tiles laid on the shower floor. Traditional cementitious grout works better for quicker water evacuation than high-performing stain-resistant dense grouts. Note the excellent condition of a 20-year-old marble shower featuring traditional simple grout that gets basic cleaning!
 |
|
Embedding marble into fresh mortar with pre-flattened ridges |
6) Marble Tile Installation on Shower Walls
While a simple approach to setting materials with higher porosity are, in my opinion, the best choice to install marble tiles over a water in / water out shower system, premium modified thin-set mortars conforming to ANSI 118.15 standard can be used to install stone on shower walls.
It is important to apply such mortars using an appropriate notch trowel over a waterproof backing system using directional troweling method that allows to achieve optimal mortar contact with substrate and eliminate voids (see TCNA Handbook 2020, Mortar Application and Coverage, Directional Troweling, page 35). It is important to understand water and vapor management systems for shower walls and floors to provide more predictable results with natural stone.
More information about the availability of high-performing mortars can be obtained from the mortar manufacturer’s representatives.
 |
|
Full mortar coverage behind Carrara marble on a shower wall. |
7) Impregnating/penetrating sealers and marble installed with the water in / water out method
To avoid moisture discoloration of the marble installed with the traditional shower floor system it is my opinion that natural stone should NOT be sealed.
One of the most prominent experts in the tile and stone industry, Dr. Frederick M. Hueston of Stone Forensics, explains such an approach in detail in his article “Stone impregnating sealers in wet environments? Bad idea”
(to read the article visit www.stoneforensics.com/articles/f/sealing-stone-in-wet-areas ).
The principles covered in this article will help you professionally approach challenges associated with the light-colored marble for shower applications.
Finally, use your best efforts to educate your customers about the basic maintenance and care of their newly installed marble and provide them with a premium PH-neutral cleaner designed for natural stone. Simple but regular cleaning will keep a marble shower floor installed with the water in / water out method in great condition for many years, if not decades, to come.
Pavlo (a.k.a. Pasha) Starykov is owner of Star Tile & Stone LLC, a certified stone and tile inspector, a certified tile installer (CTI #1480), and NTCA Region 9 State Ambassador. Contact the author at pavlo@startile.us with questions.