Stone Restoration and Maintenance Corner –Going from Polished to Honed
Bob Murrell
M3 Technologies
Photos by Bob Murrell
In recent articles I discussed re-honing countertops, vanities, and even floors. These surfaces do need periodic re-honing to remove any bad etching and scratching that has become too obvious from regular wear and tear. Even honed surfaces will ultimately show these wear issues, albeit much less than a polished surface.
But what about existing polished surfaces? Can they be transformed from a polished surface to a honed surface? There are obvious reasons for doing this, especially in a functional or heavy wear setting, such as a kitchen or flooring surface.
The easy answer is yes, of course they can be honed. However, there can be some problematic issues with this polished to honed operation. What do you do for all of the tight spots, like around the faucets, stove tops, sinks, and against the backsplash or other vertical surfaces? Ideally, all of the hardware should be removed, as this would remedy most of these issues except for the transition lines between the counters and vertical surfaces.
These tight spaces on the counters must be dealt with by tedious hand work. Use of diamond hand pads and even acids (for calcium-based stones) can help with these hard-to-access areas. You need to dull these down so they will blend with the newly honed surface.
This is also true when transitioning a polished flooring surface to a honed surface. Low areas will still remain polished and will show up, big-time. These must be dealt with by either removing all lippage or as described above, on the countertops.
Use of a honing powder can be quite helpful in this scenario, too. You can use the center of a natural or white pad and some 150 grit honing powder to help make the transition, working around hardware or for low areas in a floor, in transitioning from a polished surface to a honed surface.
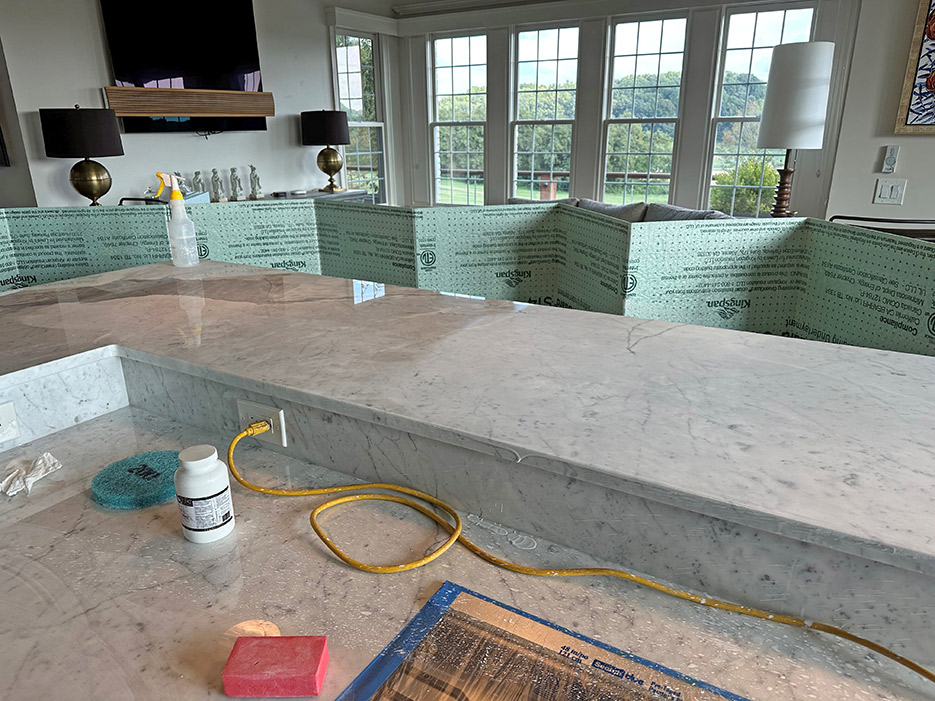
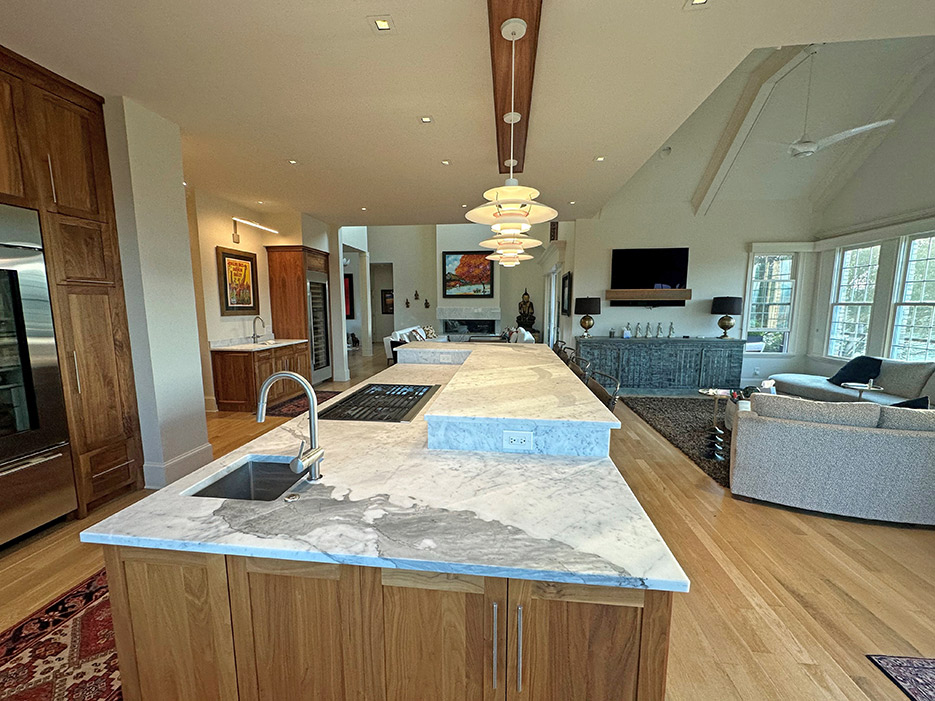
So, the next question comes up is: what level of hone will be required? The answer will depend somewhat on the type and color of the stone being worked. For a recent large white marble kitchen countertop, where all of the horizontal surfaces would be transitioned from a polished to a honed surface, the new homeowners decided that a 100 grit finish was the desired look. All of the vertical surfaces (backsplash and tiered center island splash) would remain polished. This was really a very cool look.
Other stones may look better when honed to a 200 grit or even a 400 grit. Just remember, the higher in grit the surface is taken to, the more it will show both etching and scratching.
 |
|
Above: Test area completed on center island, where the 100 grit honed finish was decided. Notice the partition wall (foam core board) and the masking on the range.
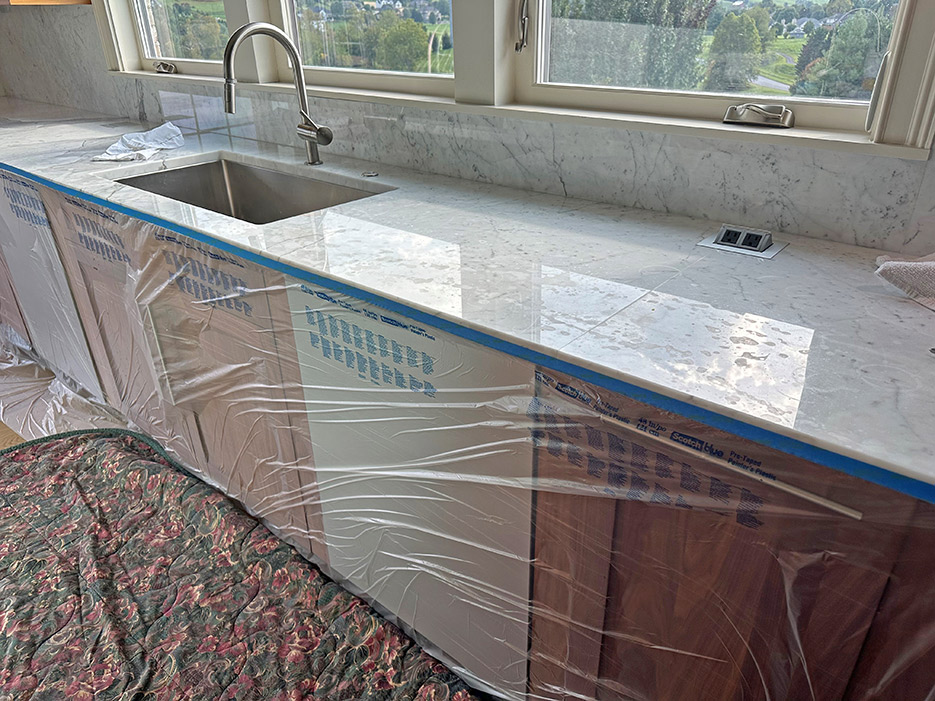
Below: Deep scratching staining and wear on the countertop. The previous owners obviously did not believe in cutting boards!! LOL! |
 |
|
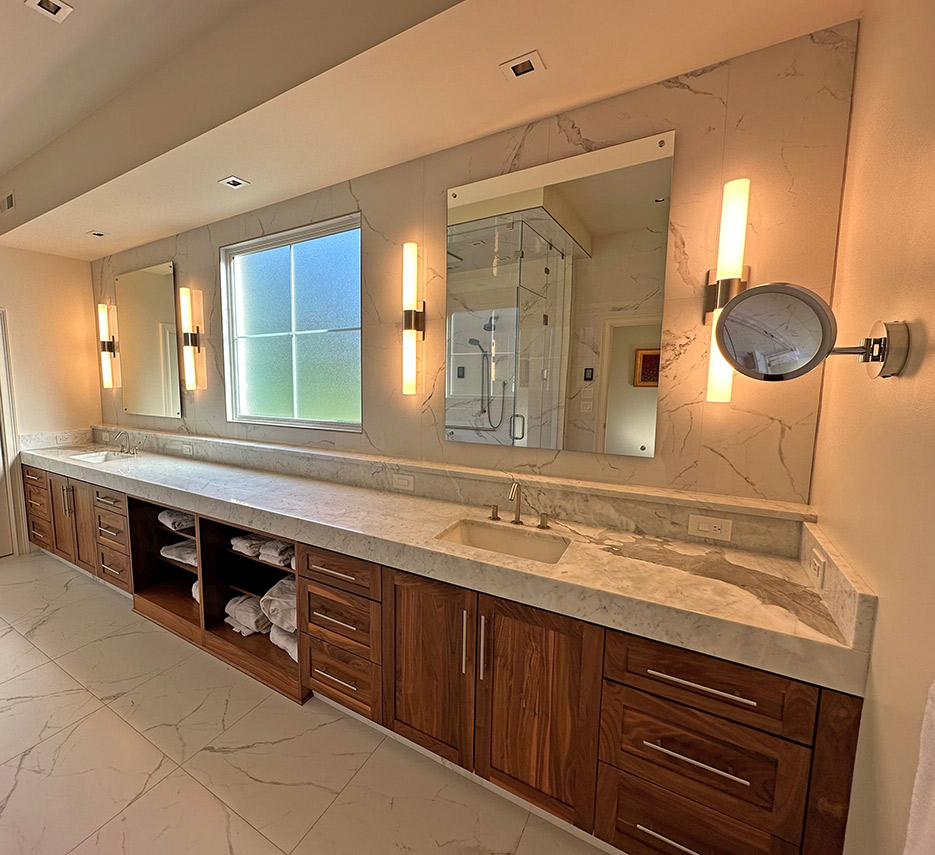
Below: The extra-long marble double vanity was also honed and re-polished. |
 |
This particular polished white marble countertop was excessively scratched and etched. The previous owners must have used the counters for cutting and chopping. Can you believe it, lol? I know that many of you have run into the same problem, where the client doesn’t have or even know what a cutting board is, lol!
The scratches in this countertop were so deep that it took quite a lot of passes, even using the 100 grit ELF flexible metal bond. Typically, a 220 grit would suffice for a starting point on countertop repairs. But hey, that’s how the finished level of hone was decided. I really don’t think that a 200 grit disc would have been very productive on these heavy scratches.
It was at this point that a 120 grit diamond hand pad was used in conjunction with the Majestic Heavy Duty Tile & Grout Cleaner acid product, to take care of the areas around fixtures and horizontal/vertical intersections. Diamond hand pads are a must, when dealing with countertops and vanities. The acid was used (undiluted) with a cotton swab, where the diamond hand pad could not reach. It took several applications to get the polish to dull adequately. Care should be taken when using undiluted acids around certain metals. Protect with masking and use caution. Keep some RTU Majestic No-Rinse pH Neutral Cleaner handy, to neutralize and rinse the acid after use.
Once most all of the polish was removed from the counters and they were honed to a consistent flexible metal-bond ELF5-100 grit finish, a 100 grit PLP diamond impregnated pad (dip) was used to help reduce the honing pattern swirls. Even when you do many, many passes, honing patterns (especially when using metal-bond diamonds) can be almost unavoidable. This is where the 100 grit PLP brings everything to a consistent soft look. When you run the PLPs wet, they cut better, so the whole process is done wet. Of course, this means that everything must be Taped and Draped, partition walls should be used, and the floor should be protected as well.
Leaving the honed areas at a 100 grit level increases the surface area, thereby exposing the stone to staining. Honed surfaces should most always be sealed using a high-quality oil and waterborne stain- resistant impregnator. I personally prefer solvent-based impregnators as I believe they penetrate better and should theoretically last longer. In my opinion, most every natural stone countertop should be impregnated, with only a few exceptions. This is especially true of honed and textured surfaces. Akemi Pearl was chosen for use on this project.
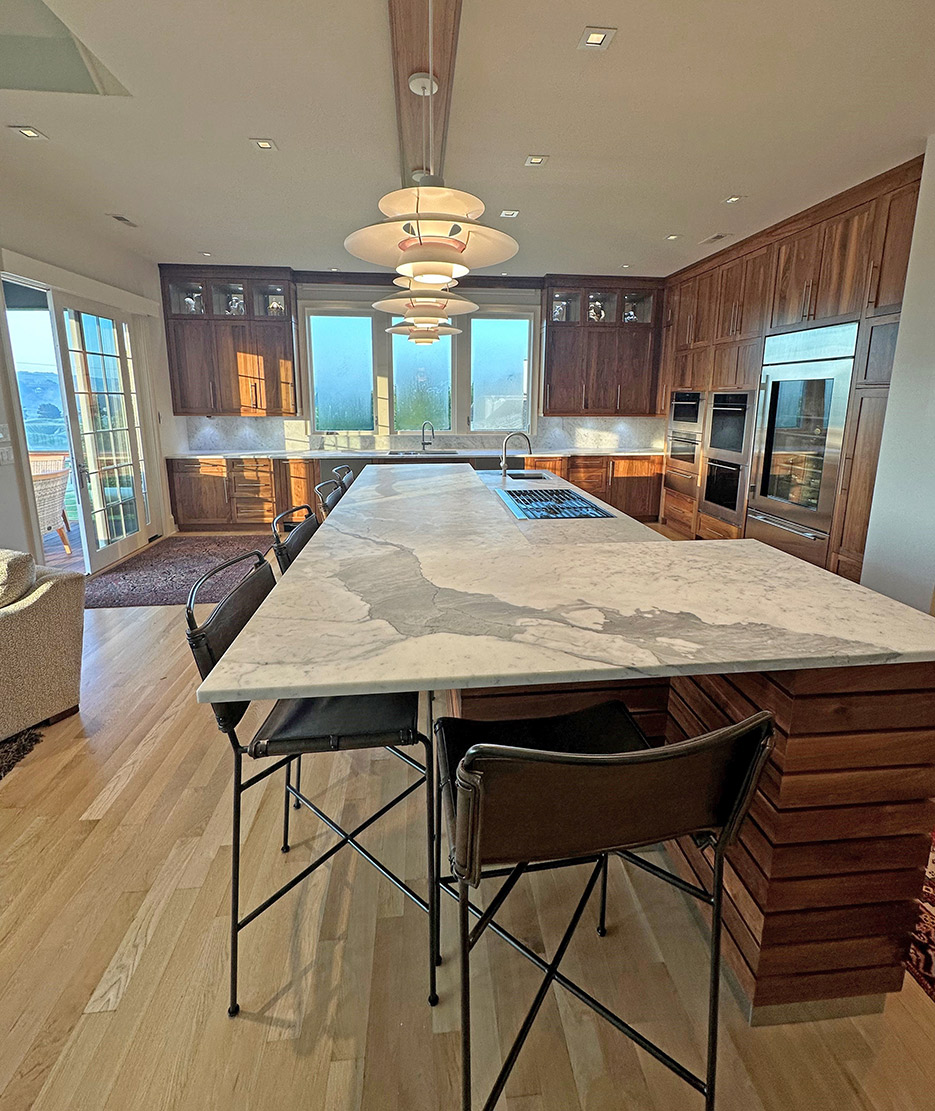
The project turned out really well and the clients were extremely pleased. The honed countertops are definitely more of a warmer look, as well as more suitable for that application.
 |
|
Above, End result: a beautiful 100 grit honed look for these marble countertops.
Below: This honed kitchen countertop looks better and will be much easier to maintain. |
 |
As always and before beginning any new project, I recommend submitting a test area to confirm the results and the procedure, prior to starting a stone or hard surface restoration/maintenance project. Also, the best way to help ensure success is by partnering with a good distributor, like BB Industries, that knows the business. They can help with technical support, product purchase decisions, and other pertinent project information.
Bob Murrell has worked in the natural stone industry for over 40 years and is well known for his expertise in natural stone, tile, and decorative concrete restoration and maintenance. He helped develop some of the main products and processes which revolutionized the industry, and is currently the Director of Operations for M3 Technologies.
Send your comments and questions to Bob at attn: publisher@slipperyrockgazette.net .